Small Kitchen Storage Ideas for Renters: 8 No-Drill Fixes
· SmallSpace AI Editorial
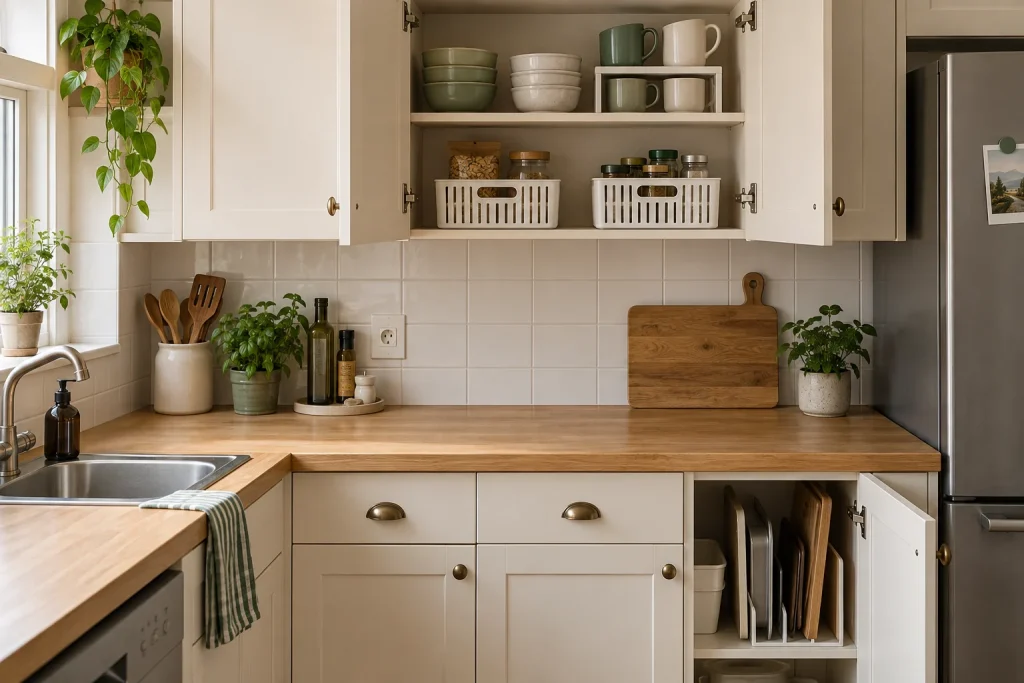
Cover image: AI-generated illustration of storage ideas, not a documented renovation.
A small rental kitchen usually needs better access before it needs more storage products. If every pan requires moving three other things, a new basket may only make the pile harder to reach.
Start with the task that interrupts cooking most often: finding ingredients, clearing a preparation area, getting a pan out, or putting dishes away. Then change one storage zone at a time. These ideas work inside existing cabinets or with freestanding pieces, so you can take them with you when you move.
Measure the opening, not just the inside of the cabinet
Before choosing an organiser, write down the usable width, depth and height. Include hinges, shelf supports, pipes and the lip at the front of a shelf. A basket can fit inside a cupboard and still be too wide to pass through the door opening.
- Width: measure the narrowest point the organiser must pass through.
- Depth: measure from the closed door to the first obstruction, including handles on a basket.
- Height: allow room for the stored item and for your hand to lift it out.
- Access: check where a drawer, door or pull-out basket travels when open.
For example, imagine a cupboard with a 16-inch clear opening and a 17-inch-wide interior. A rigid 16½-inch basket may appear suitable from the interior measurement but will not pass straight through the opening. This is an illustrative fit check, not a standard cabinet size.
1. Give one section of counter a single job: preparation
Choose the section where you can comfortably use your chopping board. Move objects that do not belong to that task: unopened groceries, paperwork, spare mugs and appliances you rarely use. Keep the board accessible without having to unload a cupboard.
Try the arrangement while preparing a normal meal. Can you set down ingredients, reach the bin and move to the sink without relocating an appliance? A counter that looks empty but cannot support your routine is not the goal. Keep appliance ventilation and clearances consistent with the appliance manual.
2. Split a tall shelf when the empty space is above short items
A freestanding shelf insert can separate mugs from small bowls or create two short stacks of dishes. It is most useful when the upper half of an existing shelf is empty and you currently stack unrelated items together.
Check the height below the insert and the remaining space above it. A riser that accommodates a mug underneath but leaves too little clearance for the plates above simply moves the problem. Check its load rating and keep the arrangement stable; do not improvise a tall tower of unconnected inserts.
3. Store boards and trays vertically in a lower cupboard
A freestanding divider lets you remove one chopping board, baking tray or cooling rack without lifting the entire stack. Sort by size, with the items you use most at the easiest-to-reach end.
Measure the biggest item while it is standing in the proposed position, including its handle. Close the cupboard gently before filling the divider. If a tray interferes with a hinge or door, choose a different cupboard rather than forcing it into place.
4. Use one removable bin for ingredients that belong to the same task
Group baking ingredients, breakfast supplies or frequently used seasonings in a bin you can lift out. Keep it light enough to handle comfortably when full. Label the front so you can return the entire group to the same place.
You do not have to decant everything into matching containers. Original packaging preserves instructions, dates and ingredient information. If you transfer food, retain the information you need and use containers suitable for food storage.
5. Test an over-door organiser before loading it
An over-cabinet-door holder can suit lightweight supplies, but the hook thickness, door clearance and position of internal shelves determine whether it works. Check that the door closes normally and that the holder does not press against the finish.
Test it empty first. If closing the door requires force, or the holder strikes plumbing or a shelf, the location is unsuitable. A small removable bin on the shelf may offer less capacity but better everyday access.
6. Divide under-sink storage around the plumbing
Map the pipes and valves before choosing containers. Two small removable bins often make it easier to work around obstacles than one large organiser. Leave plumbing accessible so a leak can be seen and maintenance does not require dismantling a storage system.
Keep cleaning products in their labelled containers and out of children’s reach, following their storage instructions. Do not use this area for food. An open basket or tension rod is an organiser, not a child-resistant lock.
7. Add a trolley only when it has a parking place
A narrow trolley can hold overflow supplies if there is a position where it does not block a door, drawer or walking route. Measure its total size, including handles and wheels. Then mark its footprint on the floor using a removable method compatible with the finish.
Open the fridge, oven and nearby cupboards while the footprint is marked. If the trolley has to move every time you cook, the extra storage may not justify the inconvenience. For a kitchen that opens into one living area, use the same circulation-first approach as our guide to creating separate studio zones.
8. Treat adhesive hooks as a product-specific choice
Removable adhesive does not mean suitable for every rental surface. Check your lease, the surface condition, the exact hook’s weight limit and the manufacturer’s application and removal instructions. Leave the removal tab accessible.
For example, Command’s hook instructions warn against wallpaper and valuable or irreplaceable items, specify waiting after painting, and explain how to stretch the strip downwards for removal. Those instructions do not establish that another brand or product behaves the same way. When the finish or permission is uncertain, choose storage that stands inside the cabinet.
A simple order for your first kitchen reset
- Choose one problem. Name the item or cooking task that is hardest to access.
- Empty that zone. Remove duplicates and things that belong elsewhere.
- Measure the usable space. Include the opening, obstructions and access path.
- Try a temporary arrangement. Reuse a suitable container before buying an organiser.
- Cook and put everything away. Judge the arrangement by both tasks.
- Buy only for the remaining gap. One correctly sized organiser is a better starting point than a matching set with nowhere to go.
The same method applies beyond the kitchen: our bedroom storage guide for renters without a closet starts with what needs to be stored and where it can remain accessible.
Common questions
What should I buy first for a small kitchen?
Start with measurements and an empty zone. If the problem is wasted height, investigate a shelf insert; if it is a pile of trays, investigate a divider. If the problem is too many rarely used items, an organiser alone will not solve it.
Can I add storage without drilling?
Yes. Freestanding inserts, dividers, removable bins and suitable over-door holders can use existing cupboards. Each still needs a fit and load check. No-drill products can damage finishes if they are incompatible or used incorrectly.
Should I use every spare inch?
No. Leave room to reach, lift and return things. A small amount of empty space can make a cupboard more useful than filling it to the door.
Leave a Reply