Tiny Entryway Storage Ideas for Apartments: Start With the Door
· SmallSpace AI Editorial
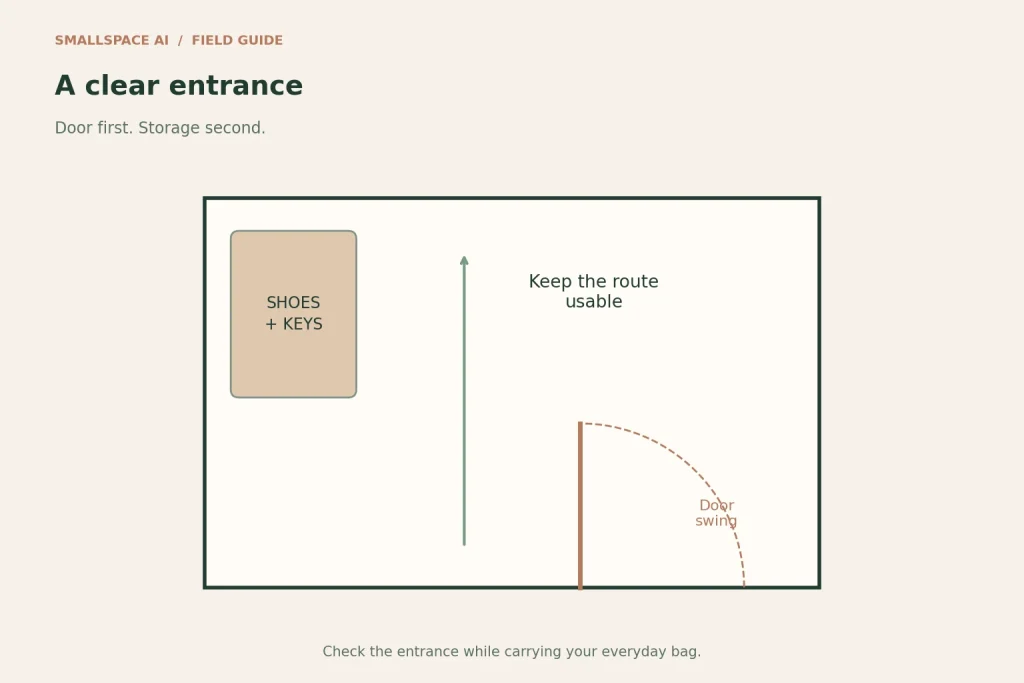
Illustration: an explanatory diagram, not a photograph or a construction drawing.
A tiny entrance has three jobs: let the door open, give arriving belongings somewhere to land, and let you leave again without searching for keys. Storage is useful only when it supports all three. Start by opening the door fully and tracing its travel with your eye before choosing furniture.
Map the entrance in three positions
Look at the space with the front door closed, fully open, and with someone standing inside carrying a bag. Include a neighbouring cupboard door and any radiator. A console that fits a closed-door photograph can occupy the exact spot where a person needs to stand while entering.
Measure the narrowest available width after the proposed furniture is in place. Do not treat a particular clearance from an online plan as a universal accessibility or escape-route standard. Your building and household may need more space. Keep shared corridors and emergency access clear.
Choose a landing zone that matches your wall
If there is a short, shallow wall beside the door, a small freestanding cabinet may hold keys on top and shoes below. Measure the cabinet depth including handles. Check the manufacturer’s stability and anchoring requirements; a tall unit that needs fixing is not automatically a no-drill solution.
If there is no useful wall, place a key tray on furniture just beyond the entrance. This can be more practical than squeezing a new shelf into the doorway. The landing zone does not have to sit immediately beside the handle to work.
Store the shoes you actually wear this week
Give everyday shoes a defined footprint: a washable tray, the lowest shelf of an existing unit, or a small ventilated rack. Keep spare and seasonal pairs elsewhere. Count pairs before buying; a rack advertised by capacity may assume smaller shoes than yours.
For two people, try a one-pair-per-person entrance rule for a week. If boots or wet footwear are common, leave room for drying instead of packing everything into a closed box. Clean and dry the floor underneath regularly rather than trapping moisture beneath a permanent pile.
Give bags a place without creating a snag
Hooks work best when a loaded bag does not project into the walking route. Check the projection with your largest everyday bag, not an empty tote. If wall fixing is not permitted, a stable existing shelf or a basket beyond the doorway may be simpler than a freestanding coat tree with spreading feet.
For adhesive hooks, use the exact product’s surface, load and removal instructions. Our no-drill wall decor guide explains why removable adhesive still needs a compatibility check.
Test an example before buying
Imagine an entrance with a short wall on one side and a cupboard opposite it. Mark a proposed cabinet footprint using a finish-safe removable method. Then open both doors, put on shoes, pick up a full bag and walk through. If any step requires moving the cabinet, reduce its depth or move the landing zone farther into the apartment.
The diagram illustrates this sequence rather than prescribing a room size: door first, storage second, clear route third. Use your own measurements to decide whether there is room for furniture at all.
A five-minute evening reset
- Return keys and access cards to the same tray.
- Remove parcels, recycling and shopping bags from the route.
- Keep only current footwear at the entrance.
- Put tomorrow’s bag in its assigned place.
- Check that the door and nearby cupboard still open freely.
If overflow keeps returning, solve its destination rather than enlarging the entrance pile. See removable storage upgrades for choosing a home for items used less often.
Leave a Reply